
Table of Contents
Cooking with a Dutch oven can be confusing at first. It can be a bit daunting, but there are some simple techniques that will help you master this effective cooking method. Once you have mastered this incredible cooking device, the joy of cooking outdoors will be limitless. You can roast, bake, or stew almost anything.
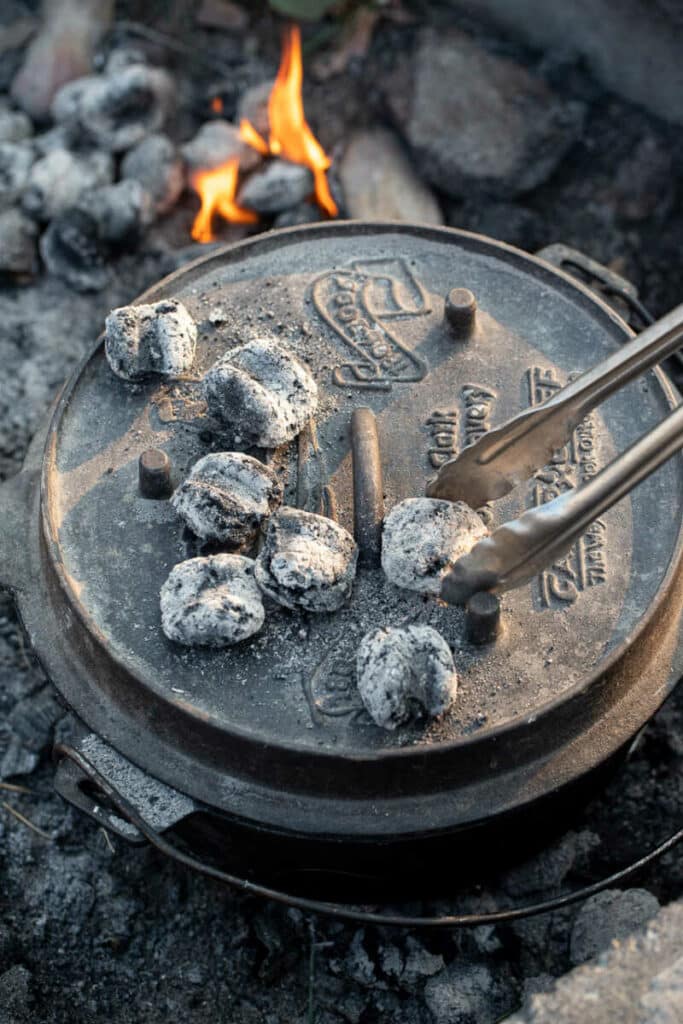
The temperature of a dutch oven over a campfire can be managed by placing a certain amount of coal underneath and on top of the Dutch oven. By using this method you can estimate the internal cooking temperature. These numbers are not exact, and the art of cooking with a dutch oven still requires some trial and error but with experience, these numbers are a perfect start.
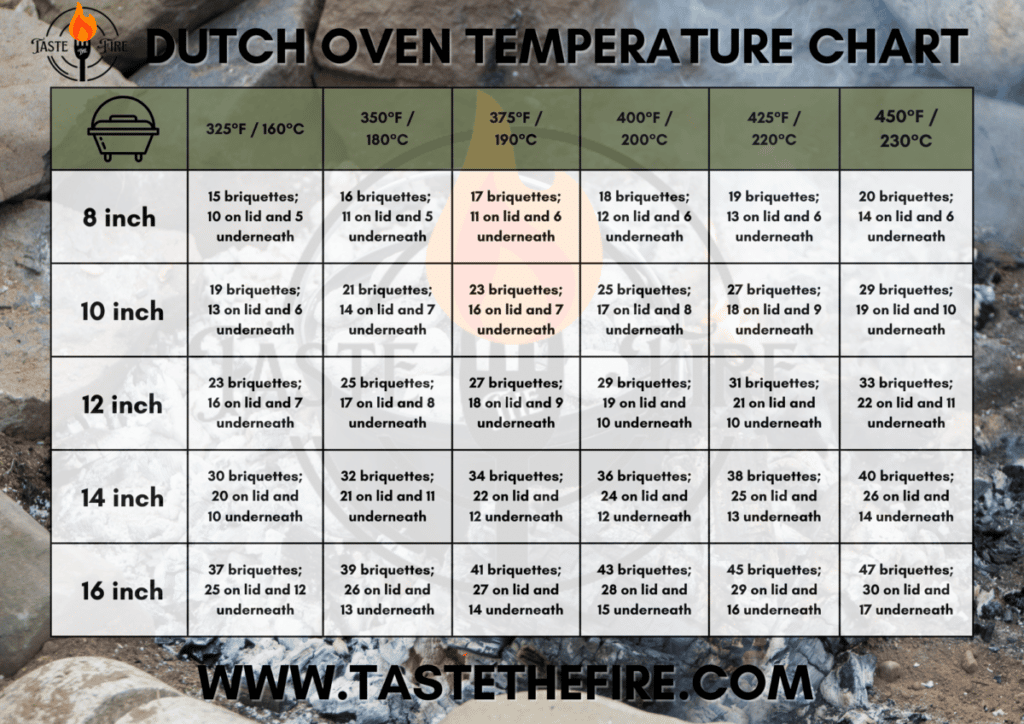
The Dutch oven cooking temperature chart is designed to help you determine how many coals to use and which placement method will provide the desired temperature. But only consider this chart a guide as weather and elevation can affect the internal temperature.
How to use the chart
The handy dutch oven temperature chart has been designed for anyone to easily reference and will help you decide on coal placement and pattern. The coal placement is usually a circle of coal underneath the Dutch oven. This is why they have stubby little legs. The coals placed on top of lid, are scattered evenly in a checkerboard pattern to spread the heat.
The fundamentals of Dutch Oven cooking is getting the ratio of heat placement from top to bottom correct.
- Baking: 3:1; 3 coals on top for every 1 coal underneath.
- Roasting: 1:1; Coals placed even top and bottom.
- Stewing and simmering: 4:1; 4 coals on top for every 1 coal underneath.
- Frying and boiling: 0:1; all coal underneath the Dutch oven.
The amount of coals depends on the size of the dutch oven. The size of your dutch oven is dictated by budget and how many hungry faces you intend to feed.
Dutch Oven size per person served
- 8-inch dutch oven / 1-2 people
- 10-inch dutch oven / 4-7 people
- Standard 12-inch dutch oven / 12-14 people
- Deep 12-inch dutch oven / 16 – 20 people
- Standard 14-inch dutch oven / 16 – 20 people
- Deep 14-inch dutch oven / 22 – 28 people

Temperature levels
Some dutch oven recipes indicate a basic level of heat rather than an exact temperature. The basic guideline is as follows
Temperature Level
- Slow 250-350 degrees F | 120 – 180 degrees C
- Moderate 350-400 degrees F | 180 – 200 degrees C
- Hot 400-450 degrees F | 200 – 230 degrees C
- Very Hot 450-500 degrees F | 230 – 260 degrees C
We have a dutch oven charcoal chart available for download as a pdf here or you can save this image. But for those of you who like it text-based copy and paste this, print it off and keep it with your dutch oven cookware.
8-inch Dutch oven
- 325°F / 160°C – 15 briquettes; 10 on lid and 5 underneath
- 350°F / 180°C – 16 briquettes; 11 on lid and 5 underneath
- 375°F / 190°C – 17 briquettes; 11 on lid and 6 underneath
- 400°F / 200°C – 18 briquettes; 12 on lid and 6 underneath
- 425°F / 220°C – 19 briquettes; 13 on lid and 6 underneath
- 450°F / 230°C – 20 briquettes; 14 on lid and 6 underneath
10-inch Dutch oven
- 325°F / 160°C – 19 briquettes; 13 on lid and 6 underneath
- 350°F / 180°C – 21 briquettes; 14 on lid and 7 underneath
- 375°F / 190°C – 23 briquettes; 16 on lid and 7 underneath
- 400°F / 200°C – 25 briquettes; 17 on lid and 8 underneath
- 425°F / 220°C – 27 briquettes; 18 on lid and 9 underneath
- 450°F / 230°C – 29 briquettes; 19 on lid and 10 underneath
12-inch Dutch oven
- 325°F / 160°C – 23 briquettes; 16 on lid and 7 underneath
- 350°F / 180°C – 25 briquettes; 17 on lid and 8 underneath
- 375°F / 190°C – 27 briquettes; 18 on lid and 9 underneath
- 400°F / 200°C – 29 briquettes; 19 on lid and 10 underneath
- 425°F / 220°C – 31 briquettes; 21 on lid and 10 underneath
- 450°F / 230°C – 33 briquettes; 22 on lid and 11 underneath
14-inch Dutch oven
- 325°F / 160°C – 30 briquettes; 20 on lid and 10 underneath
- 350°F / 180°C – 32 briquettes; 21 on lid and 11 underneath
- 375°F / 190°C – 34 briquettes; 22 on lid and 12 underneath
- 400°F / 200°C – 36 briquettes; 24 on lid and 12 underneath
- 425°F / 220°C – 38 briquettes; 25 on lid and 13 underneath
- 450°F / 230°C – 40 briquettes; 26 on lid and 14 underneath
16-inch Dutch oven
- 325°F / 160°C – 37 briquettes; 25 on lid and 12 underneath
- 350°F / 180°C – 39 briquettes; 26 on lid and 13 underneath
- 375°F / 190°C – 41 briquettes; 27 on lid and 14 underneath
- 400°F / 200°C – 43 briquettes; 28 on lid and 15 underneath
- 425°F / 220°C – 45 briquettes; 29 on lid and 16 underneath
- 450°F / 230°C – 47 briquettes; 30 on lid and 17 underneath
What temperature to use the dutch oven?
The most common cooking temperature is 350°F – 180°C, most meals can be cooked at this temperature.
To get your dutch oven to that temp use this guide.
- 8 Inch – 16 briquettes; 11 on lid and 5 underneath
- 10 Inch – 21 briquettes; 14 on lid and 7 underneath
- 12 Inch – 25 briquettes; 17 on lid and 8 underneath
- 14 Inch – 32 briquettes; 21 on lid and 11 underneath
- 16 Inch – 39 briquettes; 26 on lid and 13 underneath
Wood or charcoal for the dutch oven
The whole time we have been talking about getting the dutch oven to the desired cooking temperature we have been focused on using charcoal briquettes. For good reason, they are easy to manage, easy to buy, and allow for a uniform and consistent burn. But it’s not the only available option.
You can use lump charcoal, this is a natural charcoal that is made by burning wood with no oxygen. You can make your own or buy some that are often marketed as restaurant-grade lump charcoal for cooking. It burns much easier but doesn’t hold the temperature for as long. If you are using lump charcoal then you will need to replace them more often.
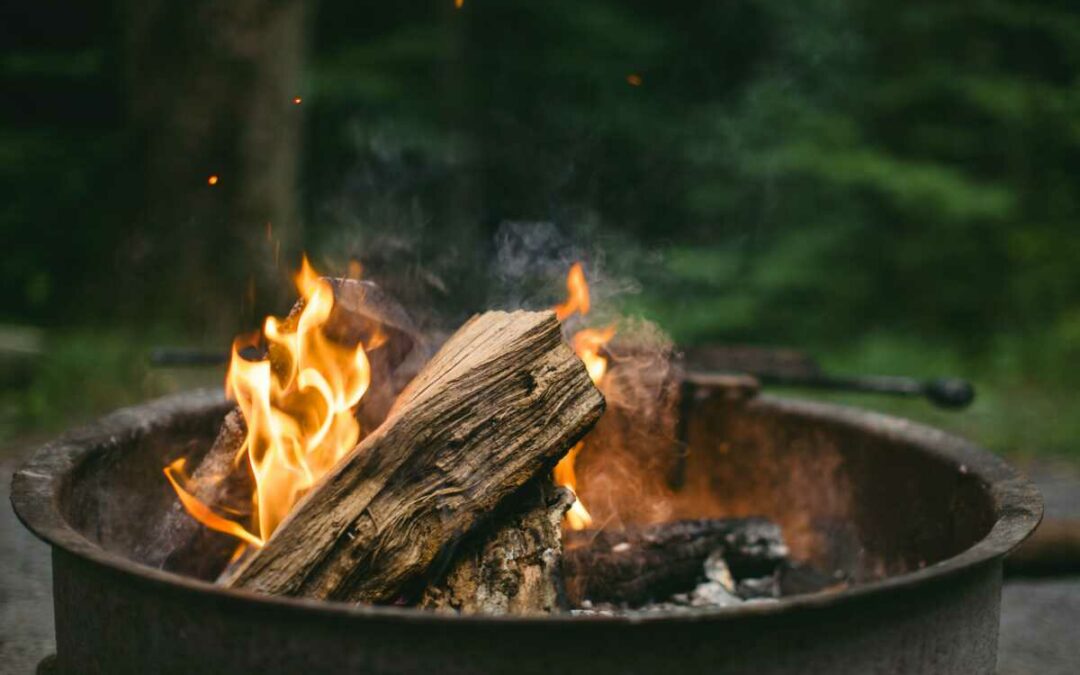
You can also use the wood embers from your campfire, they are really not as efficient as maintaining heat as a briquette and are hard to maintain a good cooking temperature. But they have one really strong key benefit. They are free If you are cooking around a campfire and are willing to rotate the charcoal as it loses its heat then it’s worth the effort.
I personally recommend briquettes if you have any but if you are in a pickle, just use what you have to hand. I often cook with wood embers as it’s less hassle.
Wind and elevation affect dutch oven temperature
The above chart and cooking temperatures are just a guide, they are baseline to work from. When cooking outdoors you can have many environmental factors to consider. Such as:
Wet ground: Having the dutch oven on moist and wet ground can draw the heat from the oven and reduce its effectiveness. Placing rocks or even a aluminum drip tray underneath can help retain the heat.
Wind / Cold air: Whenever you’re outdoor cooking wind is the bane of all chefs. It can significantly affect heat distribution. I will often find some sort of barrier to protect the fire from direct wind. You can use rocks, logs, or even a specific metal windshield.
Elevation: Cooking at higher elevations, above 7000 ft the charcoal will burn much quicker. You will need to add coal frequently and to adjust the cooking temperature more often.
Aluminum and cast iron dutch oven temperatures
All the above numbers are for cast iron dutch ovens. Aluminum camp dutch ovens are becoming more and more popular as they weigh much less, they are easy to clean and heat very quickly.

To adjust the cooking temperatures for aluminum dutch ovens remove 25% of the charcoal briquettes.
Although the aluminum dutch oven loses heat much quicker if you are cooking in sub-optimal conditions then use the same amount of coals as you would with a cast iron dutch oven.
Maintaining even heat
To maintain the heat in your dutch oven you will need to add fresh charcoal briquettes every 30 mins to maintain the heat.
To keep the heat consistent I have a little batch of charcoal burning separately so when I need to I can add more to the to top of the lid or underneath.
Stacking heat
Once you get started with a dutch oven cast iron cookware you realize how limitless it is. I often have one going while I am smoking some meat or grilling. I will make a chili or some bread. But if I have a few dutch ovens going space can be limited so I have started to stack them. This has been a bit tricky to master at first but now I have got it going I am able to save space and fuel.
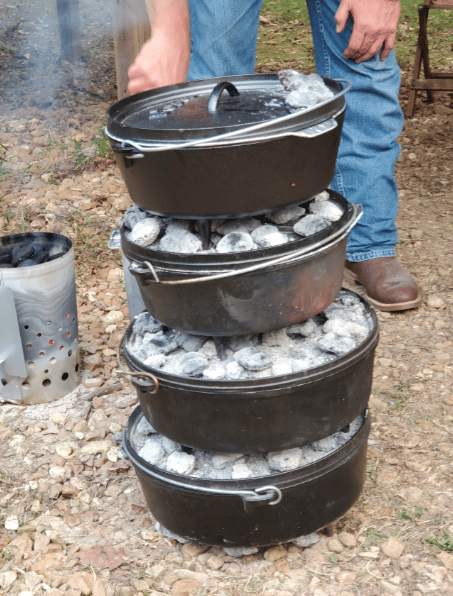
As the smaller dutch oven sits on top of the larger one it, takes the heat from the coal on the lid and helps to retain the heat from the lower one. It requires fewer coals.
It’s best to have the ingredients that need a hotter cooking temperature at the top as the heat will rise and the top dutch oven is getting more heat than the lower one.
Dutch Oven Temperature tips
- To evenly bake inside the dutch oven, turn the lid a quarter turn every 10-15 minutes to ensure an even heat. It’s a good idea to have a lid lifter for this.
- When baking to make lifting the goods out of the dutch oven, try using a dutch oven liner. You can use heavy-duty foil or you can make your own using baking parchment paper.
- You can cook your food more, but you can’t un-burn your food. If in doubt less heat is better and you can slowly cook your meal. Better wait than burn the food.


0 Comments